Subarticle of DIYing a plug that fits the... | PlayStation development | Published 2022-02-20 14:29:58 UTC
First of all, thank you to everyone for giving me advice.
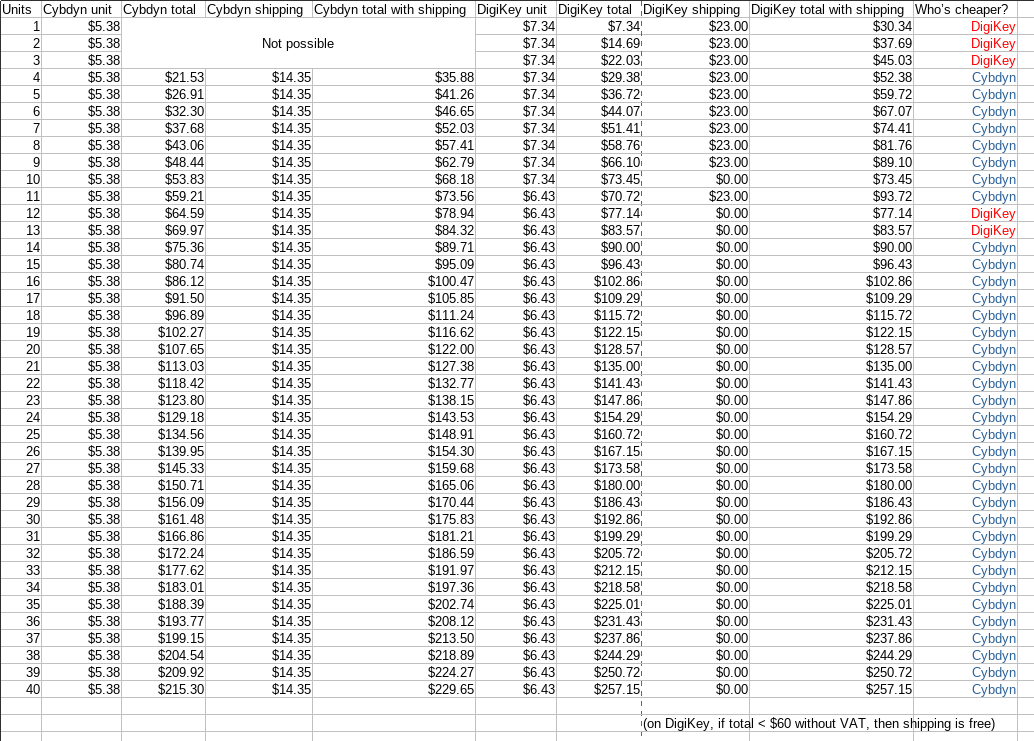
About the Cybdyn Systems deal: they offered to sell me 4 connectors for $30 AUD, so around $21.53 USD ? $5.38 USD per connector. Actually very reasonable, considering that these are purpose-made connectors.
However, I did not go through with it, because overseas shipping is unpractical at best (around $23 USD from DigiKey, $20 AUD (~$14 USD) from Cybdyn) for such low-volume applications. Sure, if I ever decide to make hardware on a larger scale, I'd probably buy these connectors in bulk, making the shipping cost negligible. The Cybdyn connectors are cheaper at $5.38 per piece (when purchasing 4), while DigiKey ones are $7.46 per piece or $6.58 per piece when ordering over 10 pieces (VAT included, converted from CZK). However, on DigiKey, if your order is >$60 excluding VAT, then shipping is free.
So I made this spreadsheet comparing the two, and in most cases, Cybdyn seems to win out on price (and remember, the price they offered to me was for the lowest volume, so it might go even lower for higher volumes):
That said, ordering from Cybdyn seemed like a weird back-alley deal, sending personal information over chat and accepting only credit/debit cards. So in the end, I'm not really sure.
However, as this is a small personal project, I am not that interested in purchasing those connectors in such large scale at this time. That is why I started making my own connector in the first place 😉
Speaking of that, I made some progress, as promised yesterday!
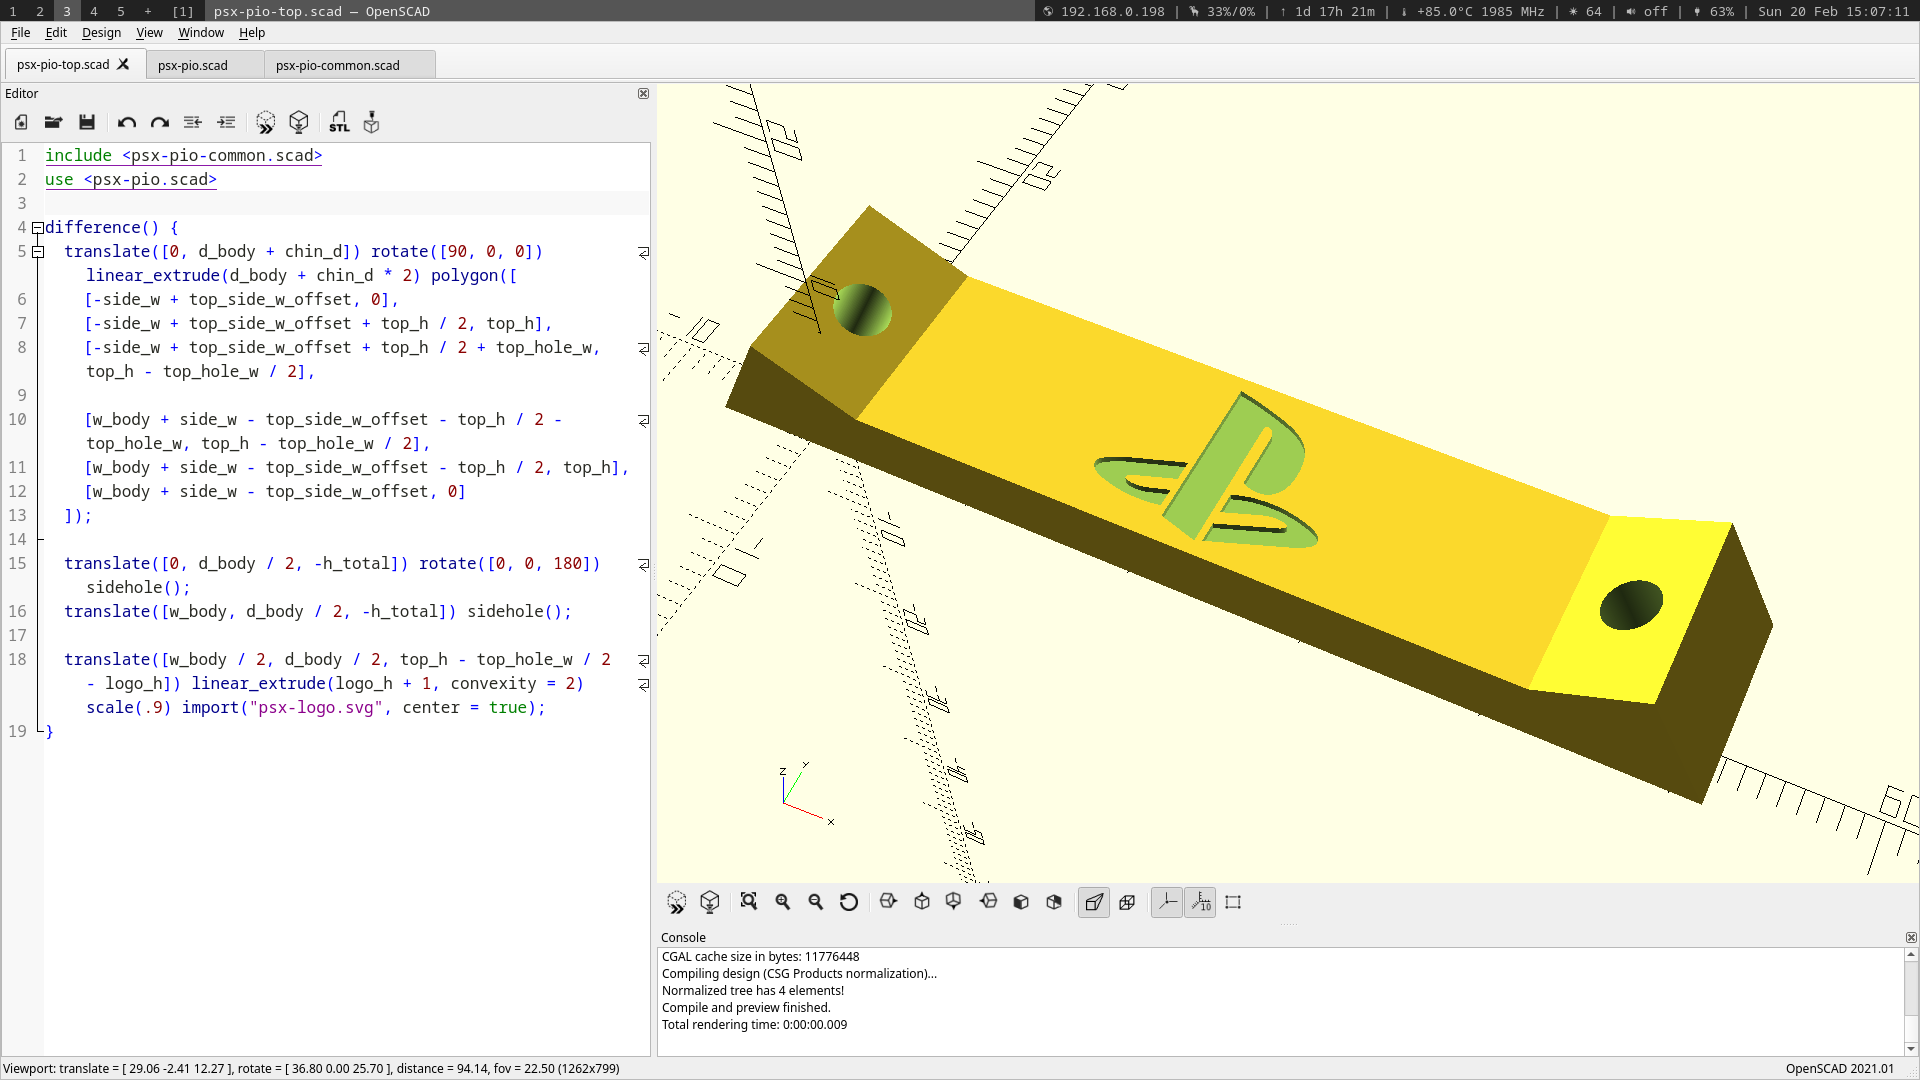
The 3D models for the design of the complete connector assembly is finished, and is available in the same GitHub repo.
The bottom part as well as the jig for making the required pins have already been described in detail in previous posts, but now, I have finished the design by finally making the top part. It wasn't as hard as I though, and I even embossed it with the PlayStation logo (please don't sue me):
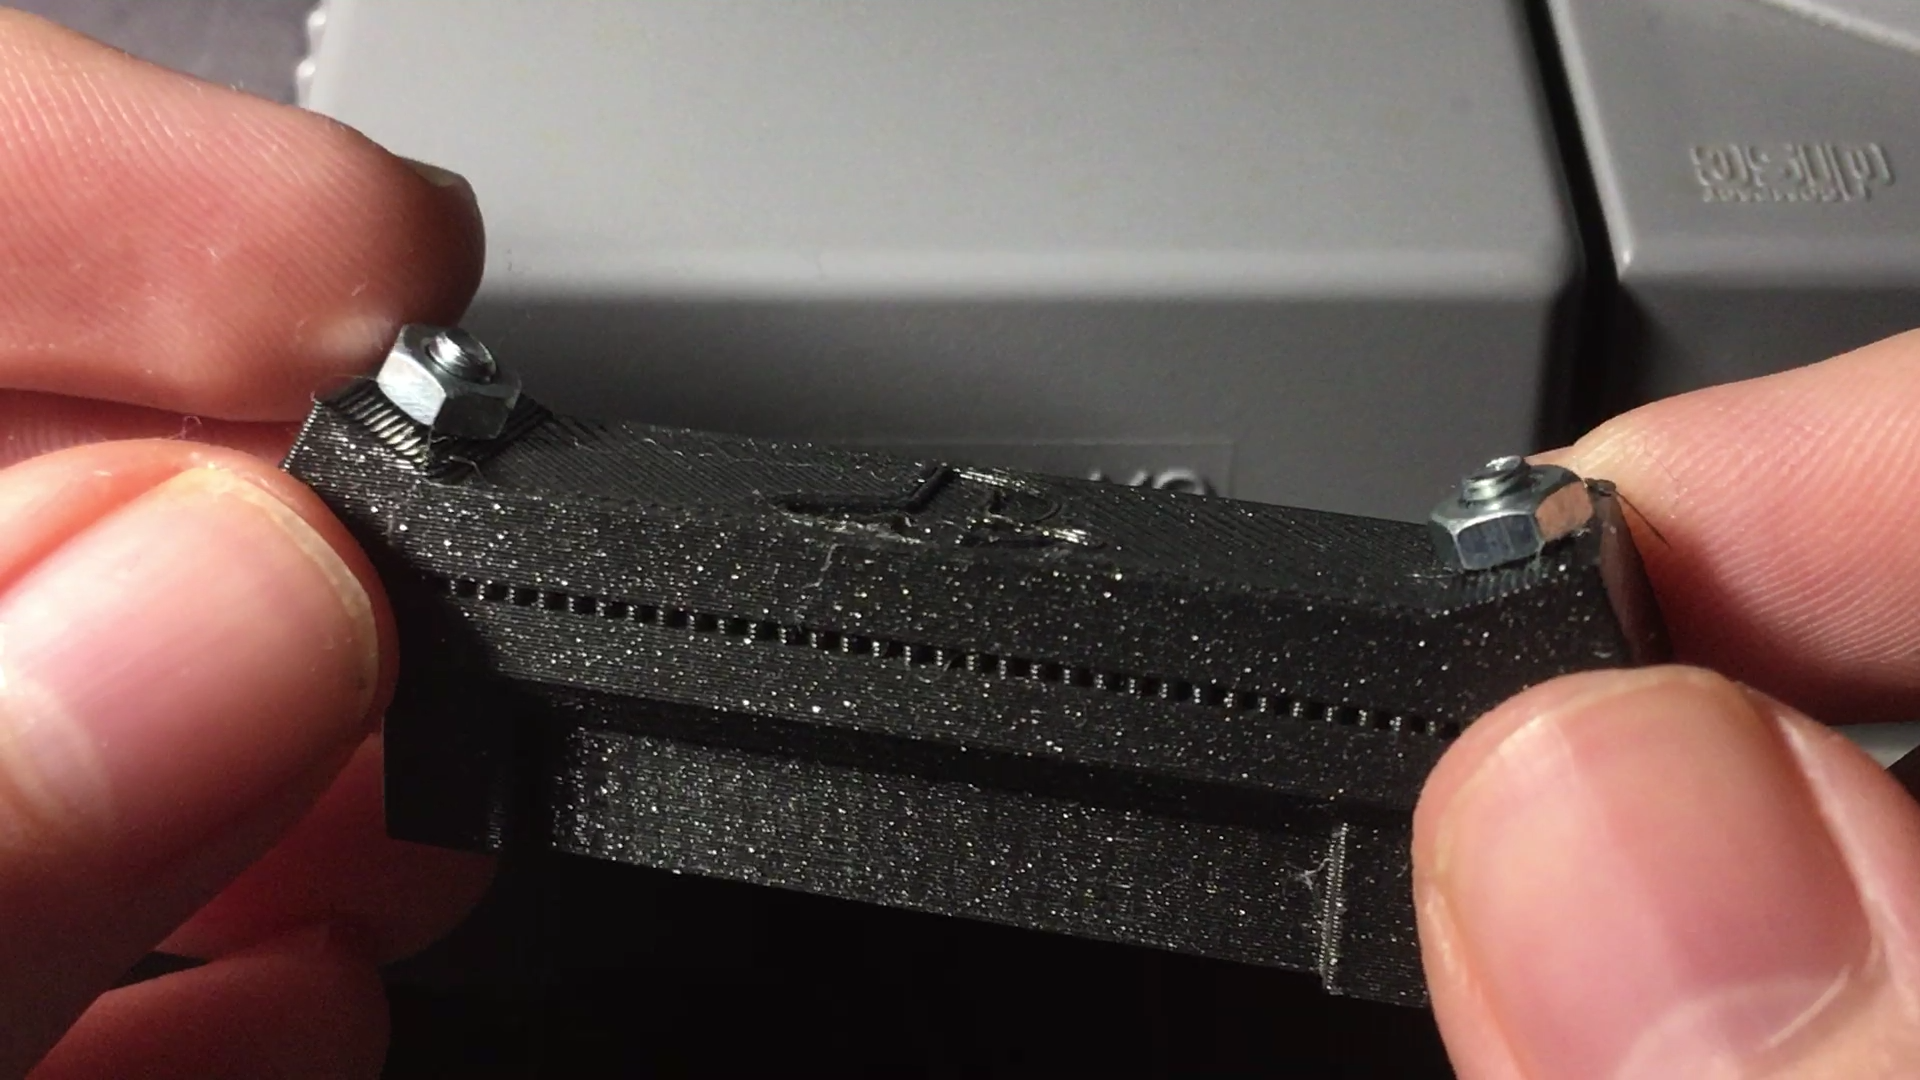
You just screw the two parts together (screw head on the bottom part, nut on the top part) and you have a neat little connector assembly:
For a full video showing the connector in its entirety, as well as its insertion into the console, click here.
Now, all I have to do is to make more pins and populate the connector! 😁
In order to post a comment or reply to one, please log in or create a new account:
1 comment total, 1 shown | Page 1
MottZilla (Archived from PSXDEV.net) | Posted on 2022-02-23 23:38:57 UTC
This is a pretty cool idea. 3D printing your own connector is a nice alternative if you can't source something suitable. Do you plan to design a PCB to use with it?
1 comment total, 1 shown | Page 1 | Go back to the top